This is a Team Plan feature only.
To integrate with JIRA, you’ll first need to create a connection between your Productfolio and JIRA accounts.
Step 1 – Start Integration
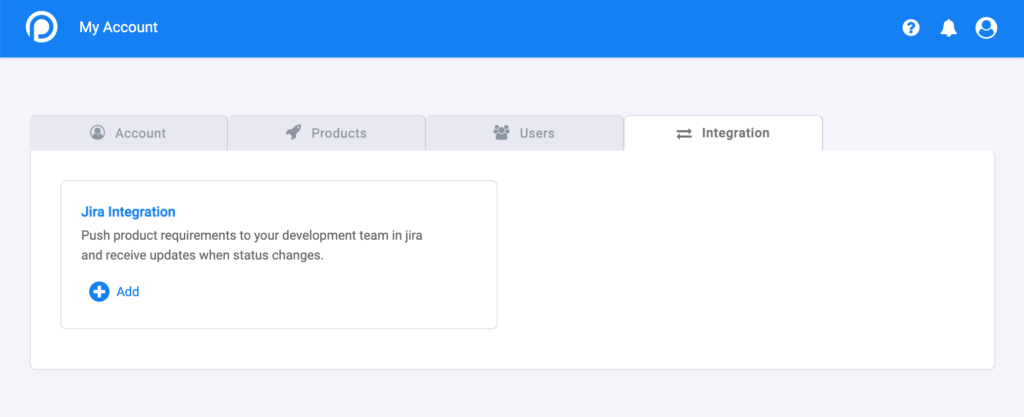
Start by going to the Account section and clicking the Integration tab. In there you’ll see a list of available 3rd party tool integrations. Click the ‘+’ icon to launch the JIRA integration tool.
Step 2 – Enter URL
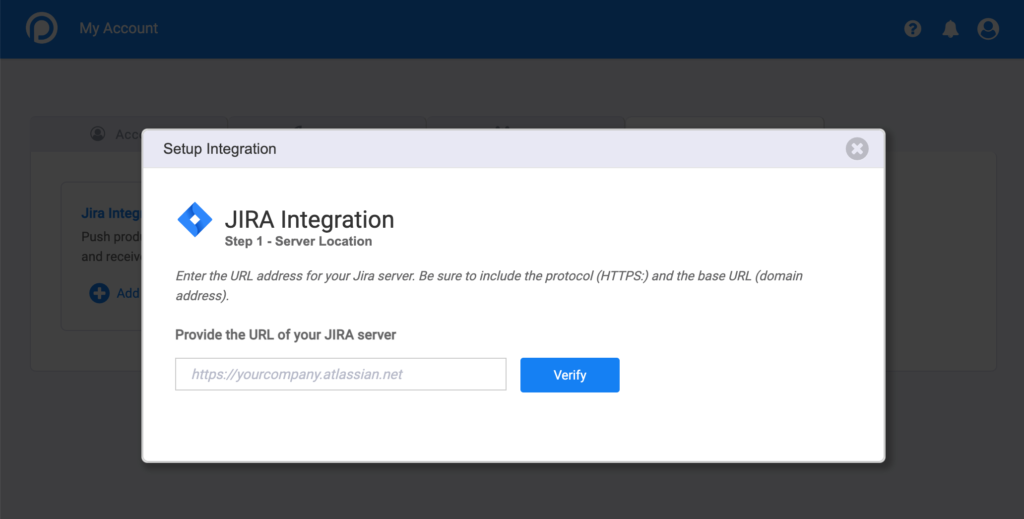
Input the unique URL of your JIRA/Atlassian URL and click ‘Continue’ to confirm the URL. You’ll see a green checkbox to confirm when it is correct.
Step 3 – Jira Instructions
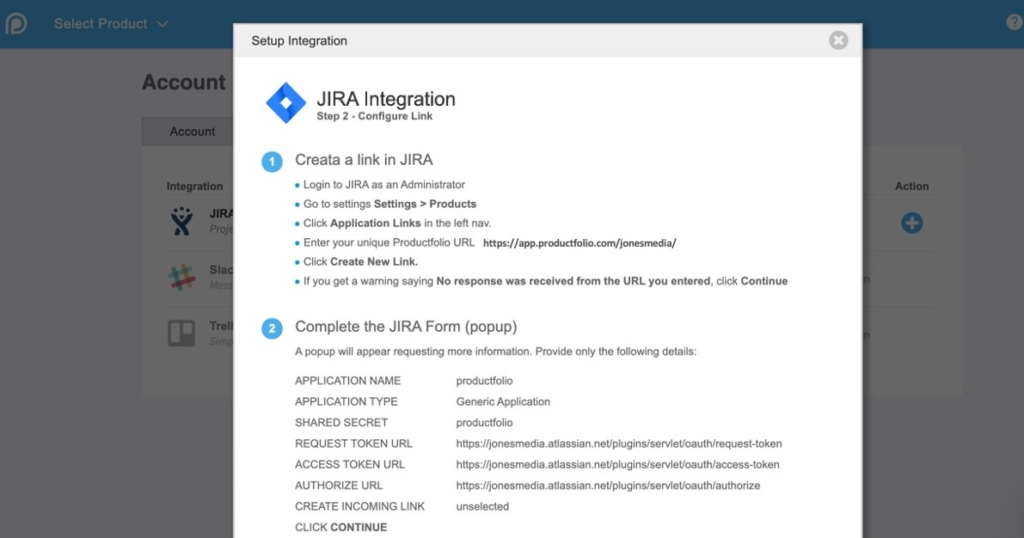
Next, you’ll see the integration instructions appear, telling you what to do inside of JIRA. Follow those instructions to find the appropriate form and enter the needed information.
Step 4 – Select Products
Login to JIRA as an Administrator and click settings (might be shown as a gear in the upper-right corner). Then click the Products link.

Step 5 – Application Links
Location the Application Links tab on the left and click to continue.
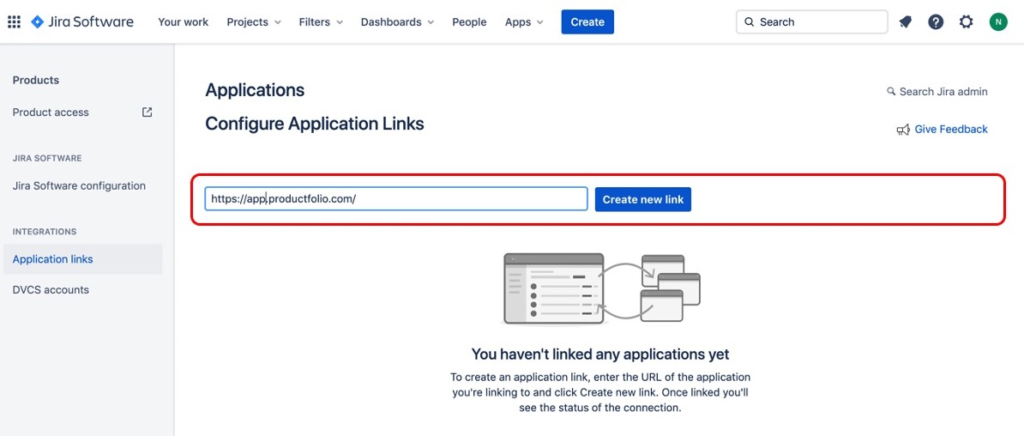
Step 6 – Create Application Link
Enter the URL for productfolio as “https://app.productfolio.com” and click to create the link.
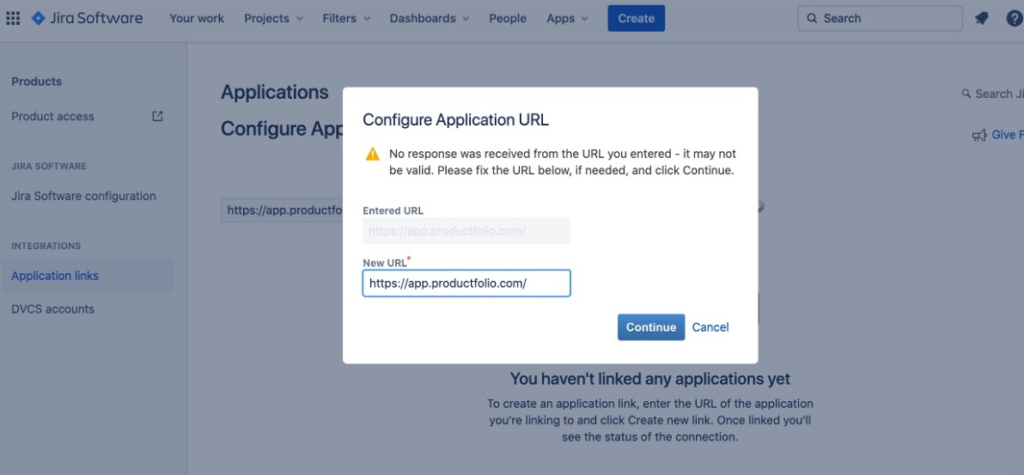
Step 7 – Press Continue
The Configuration Application URL modal will appear. It should contain the same Productfolio URL.
Note – you may see a warning that no response was received – ignore this and proceed forward.
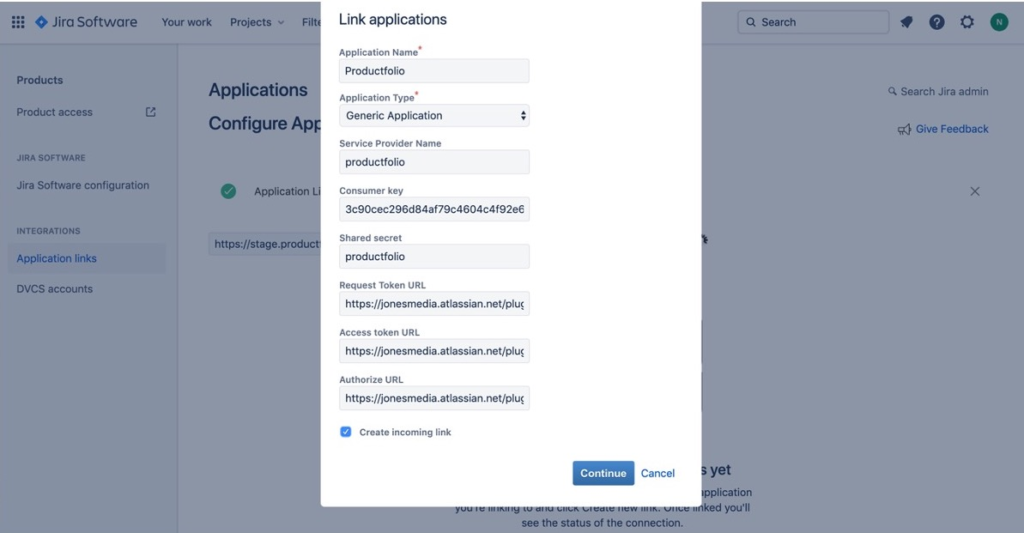
Step 8 – Fill Link Details
Now, enter the information that was provided on the instructions from Productfolio. This includes your unique consumer key.
Be sure to check the box to ‘Create Incoming Link’ as well, so you JIRA can receive information from Productfolio.
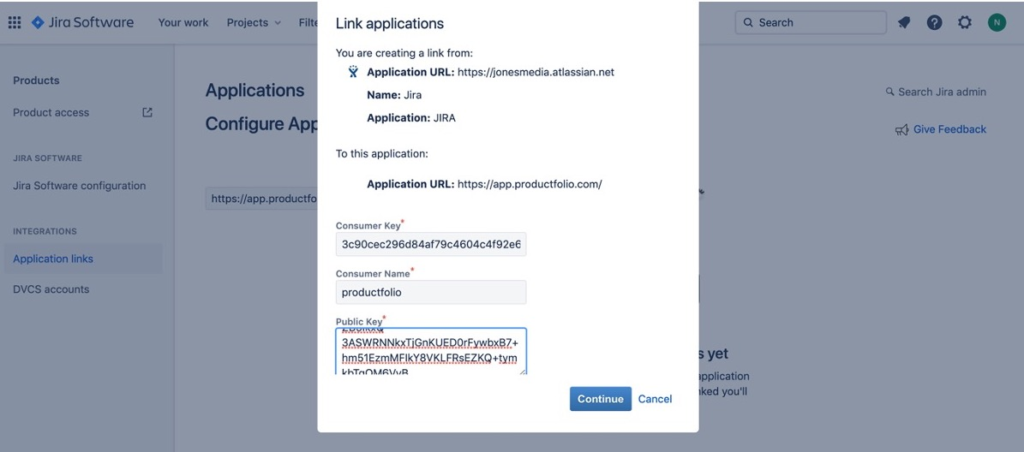
Step 9 – Link Details Cont’d
Next, enter the remaining authentication information on the next modal screen, including your consumer key (again, if asked), and your public key.
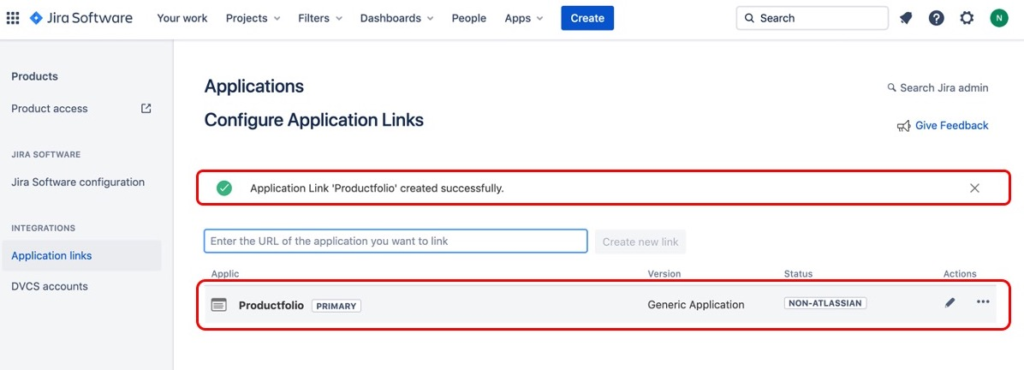
Step 10 – Configure Link
Now, you should see that an Application Link has been successfully created and listed in JIRA.
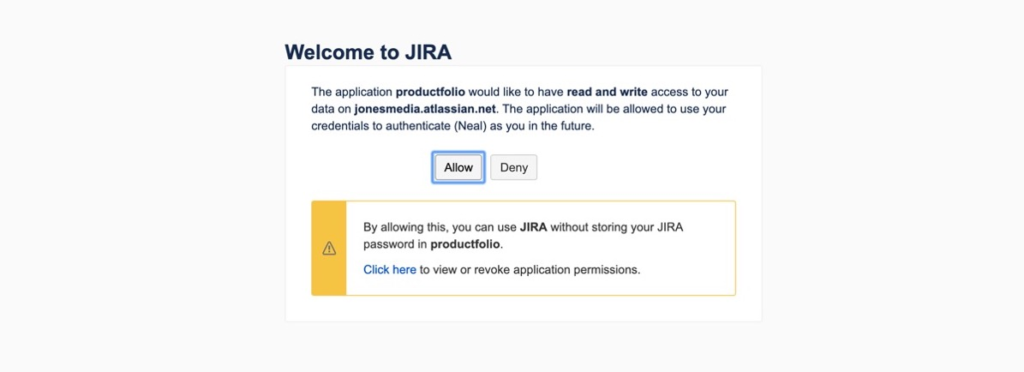
Step 11 – Authenticate
Go back to Productfolio now to complete integration, . When you click to proceed from the integration instructions, a window will appear asking you to allow authentication between JIRA/Atlassian and your Productfolio account.
Step 12 – Configure Mapping
Back on the integrations listing page, you’ll see the the ‘+’ sign for JIRA has been replaced with a ‘Configure’ link. Click this to map Productfolio’s workflow states to that of JIRA. Jira can hca complex and custom workflows setup with many different workflow states. Back in Productfolio, we indicate something as simply ‘To Do’ or ‘Done’. So as tickets change status in JIRA, this is how you can instruct Prouctoflio to interpret those states as either To Do or Done.
Congratulations.
With this step completed, you should now have a working integration between Productfolio and JIRA. To take advantage of this integration, go back to the product’s Backlog and sync your Backlog items (user stories) to JIRA. Once you sync those stories, you’ll see the corresponding tickets are populated in JIRA. You’ll also find that your status updates are sync’ed from JIRA back to Productfolio on a daily basis. This will keep your Product team and Dev teams synchronized with one another while using different tools.